How To Properly Use Pneumatic Push-In Fittings

Pneumatic systems power countless industrial machines and commercial tools, but their efficiency relies heavily on the integrity of their connections. Push-in fittings, often called push-to-connect fittings, revolutionized these systems by allowing for rapid assembly and disassembly without the need for tools or chemical sealants.
However, a loose connection or an improper seal can lead to dangerous pressure drops, system failures, and expensive downtime. Operators and technicians must understand the mechanics behind these components to maintain a safe work environment. Learn how to properly use pneumatic push-in fittings to ensure your operations run smoothly and leak-free.
Understanding the Internal Mechanism
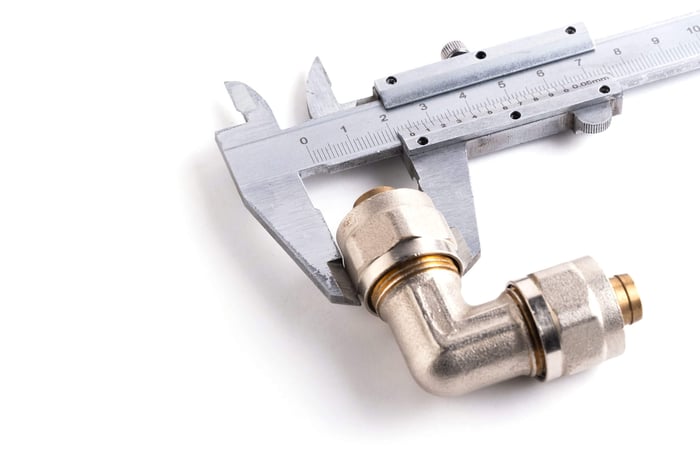
Before attempting installation, you should understand what happens inside the fitting when you insert a tube. A standard push-in fitting consists of several key parts that work in unison to create a secure seal. The outer body houses the internal components and provides the structural integrity needed to withstand pressure. Inside the body lies a stainless steel locking claw or gripping ring. This component bites into the tubing to prevent it from slipping out under pressure.
Deeper within the fitting sits the sealing ring, typically an O-ring made from nitrile rubber or a similar elastomer. This ring creates the airtight seal against the outside diameter of the tube. Finally, the release ring or collet allows you to disengage the locking claw when you need to remove the tubing. Understanding this internal architecture helps you appreciate why precise tube preparation matters so much. If the tube damages the O-ring or fails to engage the locking claw evenly, the fitting cannot function as intended.
Preparing the Tubing for Connection
A successful connection starts long before you insert the tube into the fitting. You must cut the tubing square to ensure a proper seal. Using a specialized tube cutter is the best way to achieve a clean, 90-degree cut. Side cutters or scissors often deform the tube shape, creating an oval cross-section that may not seal correctly against the internal O-ring. An angular cut can also prevent the tube from bottoming out completely in the fitting, leaving a gap where air can escape.
Inspect the cut end for any burrs, debris, or scratches. Even a small scratch on the outer surface of the tubing can create a leak path when it passes through the sealing ring. Clean the end of the tube to remove any dust or particles that might damage the internal components of the fitting. If you are reusing a piece of tubing, check the end for deep score marks from the previous connection. You should cut off the damaged section to provide a fresh surface for the new fitting.
Executing the Installation
Insert the prepared tube into the fitting with a firm, straight motion. You will feel a slight resistance as the tube passes through the locking claw, followed by a second point of resistance as it passes through the sealing ring. Continue pushing until the tube hits the tube stop at the bottom of the fitting. This creates the primary seal and ensures the locking mechanism engages fully.
Once you believe the tube is fully inserted, pull back gently on the tubing. This "pull check" sets the locking claw into the tube surface and confirms that the connection is secure. If the tube pulls out, you did not push it in far enough, or the locking mechanism is faulty. A secure tube should not move outward but may rotate within the fitting. This rotation capability is a feature of push-in fittings that allows for easier routing of air lines but does not indicate a loose connection.
Common Installation Mistakes
Many system failures stem from easily avoidable errors during the installation process. One frequent mistake involves using tubing that is too soft or incompatible with the specific fitting. Soft tubing may collapse under the grip of the locking claw, causing the tube to release unexpectedly. Always verify that the durometer (hardness) of your tubing matches the specifications of your fittings.
Another common error is ignoring the bend radius of the tubing. Forcing the tube to bend sharply right as it exits the fitting puts side-load stress on the release ring and the internal seal. This lateral force can deform the O-ring, leading to leaks, or accidentally trigger the release mechanism. Install elbow fittings to accommodate tight turns rather than forcing the tubing to bend beyond its limits. Additionally, avoid using tape or sealant on the push-in end of the connection, as these materials can contaminate the system and compromise the seal.
Disconnecting and Reconnecting
You can remove tubing from a push-in fitting just as easily as you installed it, provided you follow the correct technique. Depressurize the system completely before you begin. Attempting to disconnect a pressurized line can cause the tube to whip out dangerously. Once the air is exhausted, push the release ring evenly against the fitting body. This action retracts the locking claw from the tube surface.
While holding the release ring down, pull the tubing out of the fitting. If you pull the tube without fully depressing the release ring, the locking claw will dig deeper into the plastic, making removal difficult and potentially damaging the tube. After removal, inspect the end of the tube. You will likely see small score marks where the claw gripped it. If you plan to reconnect this tube, cut off the scored portion to ensure a leak-free seal on the next connection.

Routine Maintenance and Troubleshooting
Regular inspections keep pneumatic systems efficient. Listen for hissing sounds near connections, which indicate leaks. You can also use a soapy water solution to detect smaller leaks that might not be audible; bubbles will form at the source of the escaping air. If you find a leak, push the tube further into the fitting until it firmly hits the internal stop.
If the leak persists, remove the tube and inspect it for surface damage. A scratched tube requires trimming. If the tube surface is smooth and clean but the fitting still leaks, the internal O-ring may be damaged or worn out. In this case, replace the entire fitting. Keep the environment around your pneumatic system clean, as dirt and grime can work their way into the release rings, making disassembly difficult and shortening the lifespan of the components.
Maximizing Efficiency and Safety
Pneumatic push-in fittings offer a reliable and efficient solution for routing air in complex systems, but they demand respect and precision. By preparing your tubing correctly, inserting it fully, and avoiding side-load stress, you ensure your equipment operates at peak performance.
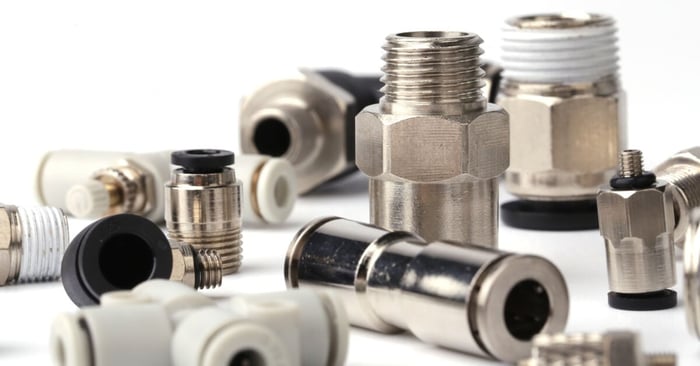
PneumaticPlus offers a wide range of high-quality push-to-connect air fittings suitable for diverse industrial and commercial applications, giving you the durability your systems require. Upgrading your pneumatic system with superior components reduces maintenance costs and enhances safety. Now that you know how to properly use pneumatic push-in fittings, you can confidently build and maintain leak-free systems that stand the test of time.