How To Ensure Leak-Free Air Fitting Connections
Compressed air systems depend on secure connections to maintain pressure and support reliable equipment operation. Even a small fitting leak can waste compressed air, force a compressor to work harder, and create inconsistent performance at downstream tools. Knowing how to ensure leak-free air fitting connections starts with selecting compatible components and continues through careful preparation, installation, and routine inspection. A disciplined approach helps protect system efficiency while reducing maintenance.
Start With the Correct Fitting for the Application
A leak-free connection begins before installation. The fitting must match the tubing or pipe material, outside diameter, thread type, and pressure requirements of the system. A fitting that looks close enough may still have a different thread standard or sealing method, which can prevent the connection from seating correctly.
Consider the operating environment as well. Temperature, vibration, moisture, chemicals, and repeated movement can affect fitting performance over time. Materials should suit the surrounding conditions and the compressed air application. When the fitting and connected components work together correctly, installers can create a more dependable seal without relying on excessive force.
Confirm Thread Types Before Assembly
Thread mismatch causes many preventable connection problems. Pneumatic systems may use tapered threads, parallel threads, or other connection styles that seal in different ways. Installers should identify both sides of the connection before applying sealant or tightening the fitting.
Never assume that two threaded parts are compatible simply because they begin to engage. Forcing mismatched threads can damage the fitting and mating port, making a reliable seal difficult even after installing the correct component. Check product specifications when thread identification is uncertain. Proper thread matching protects the connection and helps prevent damage during assembly.
Inspect Fittings and Ports for Damage
Before installation, examine the fitting threads and mating port. Dirt, metal fragments, damaged threads, or old sealing material can interfere with contact between components. Clean surfaces give the fitting the best chance to seat as designed.
Replace components that show cracks, deformation, or significant thread damage. Reusing a compromised fitting may save a few minutes during maintenance, but it can create a persistent leak that requires another shutdown later. Inspection matters especially when technicians are rebuilding an existing pneumatic circuit or replacing a component after a failure.
Prepare Threads and Sealing Surfaces Carefully
Clean preparation supports a consistent seal. Remove old thread sealant when replacing a fitting, then make sure loose material does not enter the pneumatic line. Contamination left inside a port can travel downstream and affect valves or other sensitive components.
If the connection requires thread sealant, use a product suitable for compressed air service and the thread type. Apply it according to the product instructions rather than assuming more sealant creates a better seal. Excess material can enter the airflow path, while poor placement can leave the actual sealing area exposed. Connections that use an O-ring or another mechanical seal may not require thread sealant at all.
Tighten Fittings Without Overdoing It
Correct tightening creates secure contact while protecting the fitting and port. Under-tightening can leave a path for compressed air to escape, but excessive torque can deform threads, damage seals, or crack components. More force does not automatically produce a better connection.
Follow the fitting manufacturer’s installation guidance whenever torque or engagement recommendations are available. Use the proper wrench on the intended wrench flats rather than gripping the fitting body with an unsuitable tool. Controlled installation helps maintain alignment and reduces the chance of accidental damage.
Install Push-To-Connect Fittings Correctly
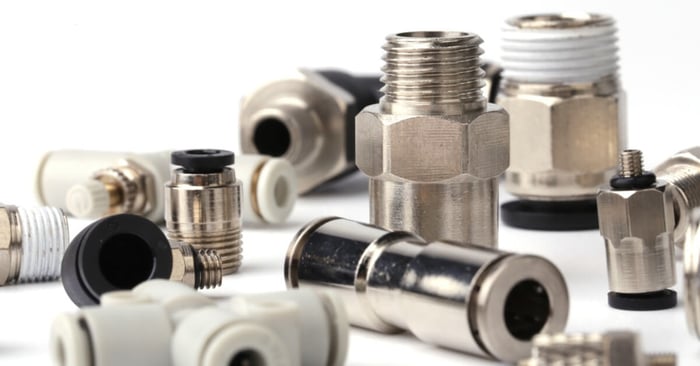
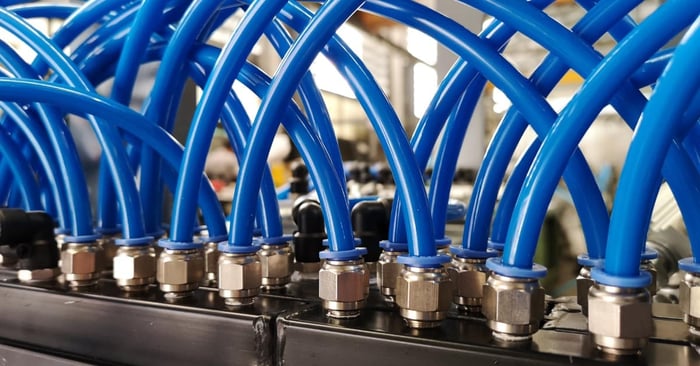
Push-to-connect fittings simplify pneumatic tubing installation, but they still require careful preparation. Cut tubing squarely so the end can seat evenly inside the fitting. A rough or angled cut may prevent the internal seal from contacting the tubing correctly.
Inspect the tubing surface near the connection point before insertion. Scratches, flattening, or other damage can create a leak path where the seal contacts the tube. Push the tubing fully into the fitting until it reaches the internal stop. After insertion, gently pull back to confirm that the gripping mechanism has engaged.
When removing tubing, depress the release collar evenly before pulling the tube straight out. Twisting or forcing the tubing can damage its surface or place unnecessary stress on the fitting. If the tubing end becomes marked after repeated use, trim it back to a clean section before reconnecting when the application allows.
Keep Tubing Aligned and Supported
A fitting should seal the connection, not serve as the primary support for a tubing run. Side loading can place continuous stress on the fitting and seal. Over time, that stress may contribute to loosening or premature wear.
Route tubing so it enters fittings without severe bends near the connection. Provide support where long runs or moving equipment could pull on the tubing. Allow enough flexibility for expected motion without creating tension at the fitting. Good routing also makes future inspection easier because technicians can access connections without disturbing nearby lines.
Test Connections After Installation
Do not assume a connection is leak-free because it looks correct. Pressurize the system under controlled conditions and check new or serviced fittings before returning equipment to normal operation. Listen for escaping air and use an appropriate leak-detection method for smaller leaks.
If a connection leaks, depressurize the system before making adjustments. Determine why the seal failed instead of repeatedly tightening the fitting. The problem may involve damaged tubing, incompatible threads, poor sealant application, or a worn sealing component. Correcting the cause produces a more reliable repair than adding force without diagnosis.
Include Fittings in Routine Leak Inspections
Connections can change after installation because pneumatic systems operate under real-world conditions. Vibration, temperature changes, equipment movement, and maintenance activity can affect fittings that originally sealed correctly. Routine inspections help identify developing leaks before they become larger sources of compressed air loss.
Pay attention to connections near frequently serviced equipment or moving machinery. When a leak appears repeatedly at the same location, look beyond the fitting itself. Poor tubing support, misalignment, or an unsuitable fitting style may be creating stress. Addressing the underlying condition can improve long-term reliability.
Build Better Connections With the Right Air Fittings
Understanding how to ensure leak-free air fitting connections comes down to matching components correctly, preparing them carefully, and verifying the finished connection. Proper installation protects compressed air performance and helps reduce unnecessary maintenance caused by recurring leaks. PneumaticPlus offers air fittings for a range of pneumatic system needs, giving engineers and purchasing teams options for new installations or replacement work. Choose fittings that match the application, then install and inspect each connection with the same attention given to the rest of the pneumatic system.