How to Choose an Air Pressure Regulator: Size, Flow & Range Buying Guide

Table of Contents
- What an Air Regulator Actually Does
- Where Regulators Get Used
- Step 1: Match the Port Size to Your Piping
- Step 2: Check the Flow (SCFM)
- Step 3: Pick the Pressure Range
- Step 4: Handle, Gauge and Bracket
- SAR or PPR: Which Series Do You Need?
- SAR Series Sizes
- PPR Series Sizes
- Quick Picks by Situation
- Common Mistakes to Avoid
- Still Not Sure? Ask Us
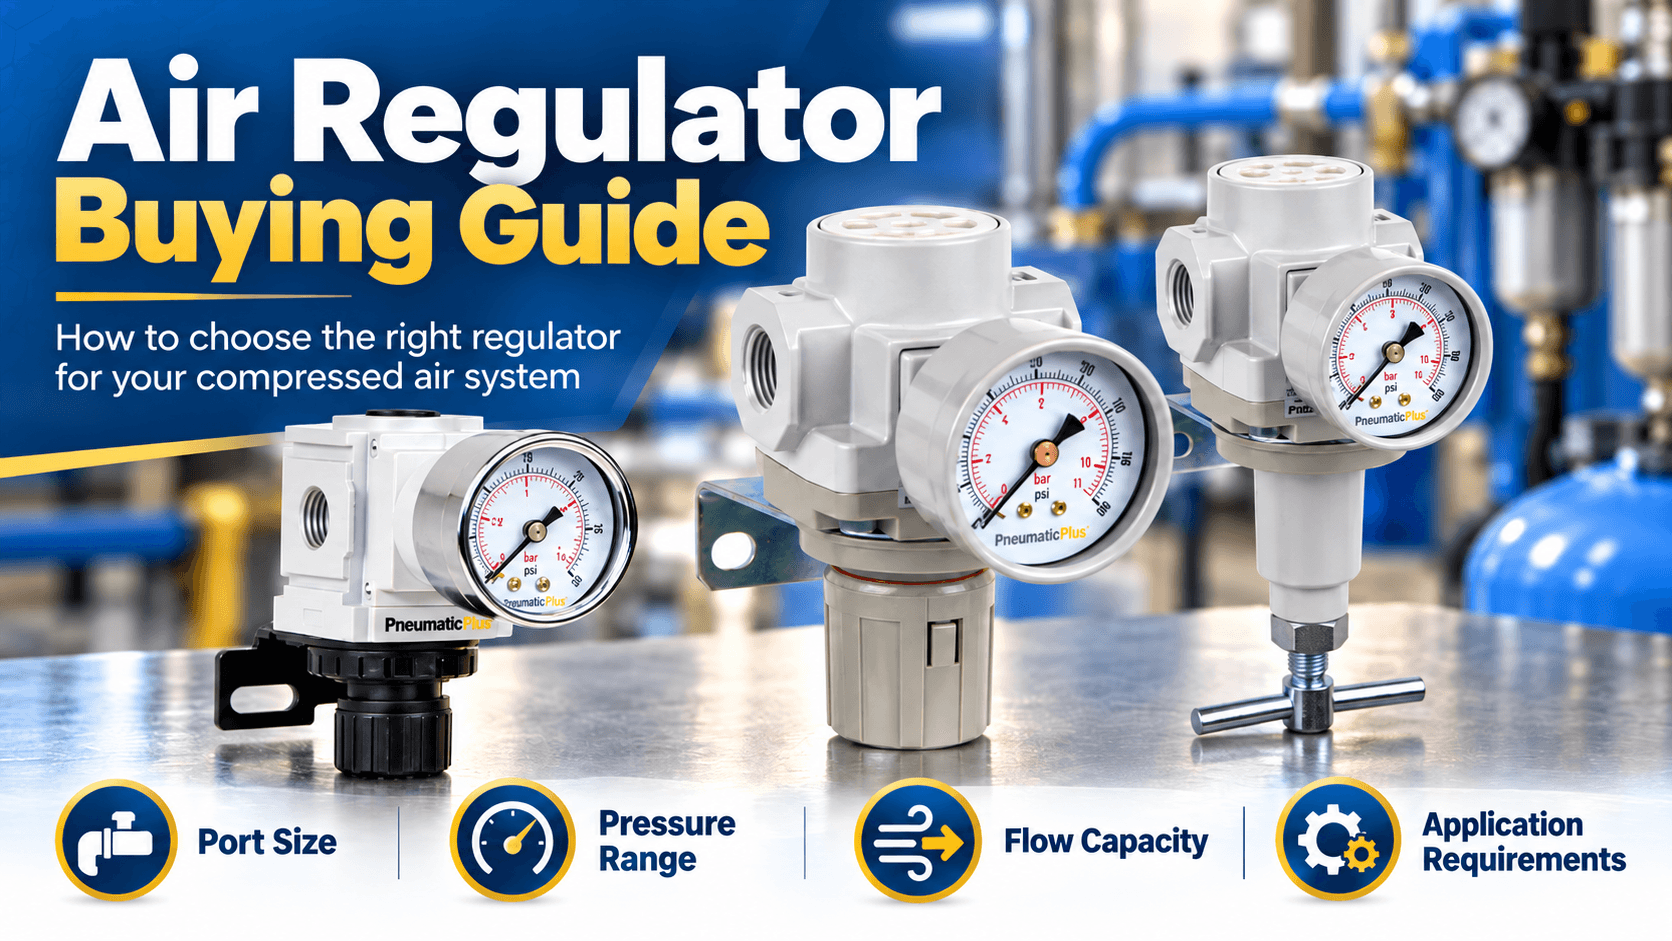
To choose an air pressure regulator, match four things in this order: the port size to your piping, the flow rating (SCFM) to what your tools or machines draw, the pressure range to the pressure you actually run, and the handle and gauge style to how you'll use it. That's the whole decision. The rest of this guide explains each step in plain language and points you to the right PneumaticPlus regulator, whether you're setting up a home garage or plumbing a production line.
We sell two regulator families, and this guide covers most of the sizes in both: the SAR series (SMC-style regulators, 1/4" to 2") and the PPR series (aftermarket replacement regulators, 1/4" to 3/4"). It is not a full catalog. If you don't see your exact size here, contact us and we'll sort it out.
What an Air Regulator Actually Does
Your compressor makes air at whatever pressure it's set to build, often 120 psi or more. Most tools and machines don't want that. A spray gun may want 30 to 50 psi, while an impact wrench works best around 90 psi. A compressed air regulator (sometimes called a compressor regulator) sits in the line and holds the pressure downstream of it steady at the number you dial in, no matter what the pressure upstream is doing.
Inside, it's a balancing act between two forces. An adjustable spring pushes a diaphragm down, which opens a small valve and lets air through. As pressure builds on the downstream side, it pushes back on the diaphragm. When the two forces balance, the valve settles into a position that holds your set pressure. Turn the knob in, the spring pushes harder, and the set pressure goes up. Back it off, and it goes down. (We cover this in more detail in How Air Pressure Regulators Work.)
Two terms matter when you shop:
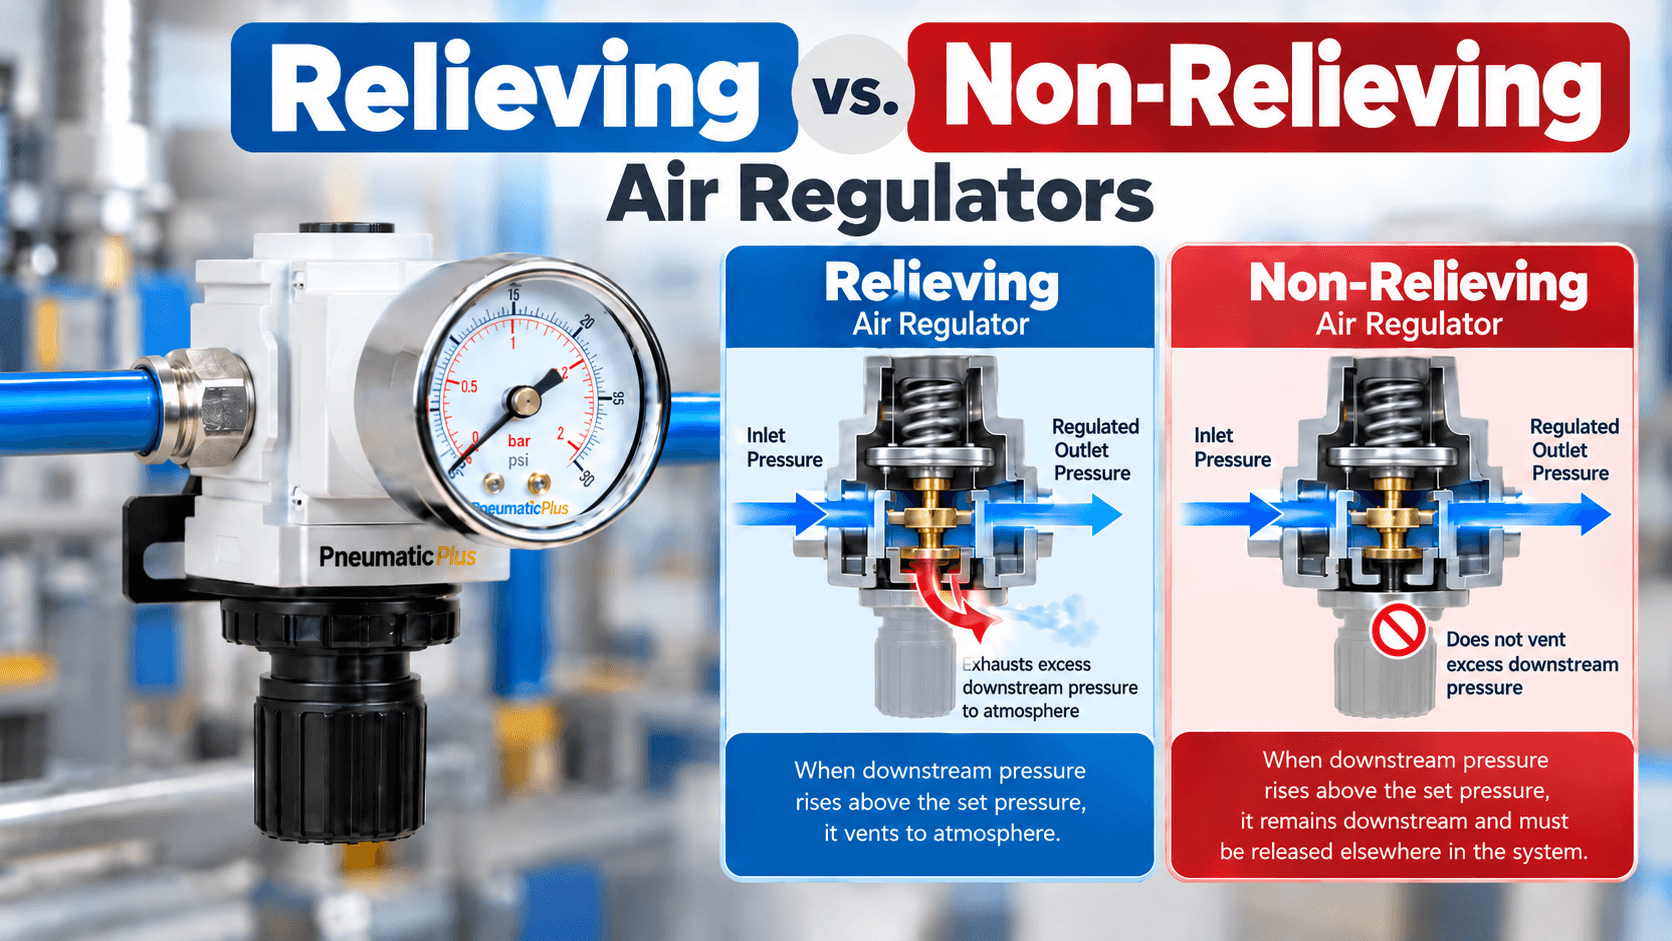
- Relieving. When you turn the set pressure down, a relieving regulator lets the extra downstream air escape to atmosphere so the pressure actually falls to the new setting. A non-relieving regulator traps it, and the outlet stays high until something downstream uses the air. Every SAR and PPR regulator in this guide is a relieving type. (More in Relieving vs. Non-Relieving Air Regulators.) Because they vent to atmosphere, these are compressed air regulators: if you're regulating anything else, talk to us first.
- Droop. The set pressure is only exact when no air is moving. Once air starts flowing, the pressure at the outlet sags. A larger regulator body, with a larger internal opening, droops less than a smaller one at the same flow. That is the single biggest reason to size up rather than down.
Where Regulators Get Used
The same device does the same job at every scale:
- Home garage and shop: a regulator at the compressor or on a wall drop so an impact wrench, a spray gun and a tire inflator can each run at the pressure they want.
- Paint and finishing: low, steady pressure at the gun for an even spray pattern.
- Machine and production lines: one regulator per machine or work cell, so a pressure change in one area doesn't upset another.
- Cylinders and actuators: clamps, small cylinders and fixtures that need a set force every cycle.
- Main lines and headers: a large regulator that steps plant pressure down for a whole branch of a facility.
Regulating properly also saves air. The Compressed Air Challenge calls the waste artificial demand: the excess volume of air consumed when you supply a higher pressure than the application needs. Any tool fed above its required pressure draws more air than it has to. On the supply side, the same sourcebook puts the cost of extra header pressure at roughly 1 percent more compressor energy for every 2 psi of discharge pressure, at full output flow. Setting each drop to the pressure the job actually needs is one of the cheapest efficiency moves in a shop.
Step 1: Match the Port Size to Your Piping
Start with the thread on your line. All SAR and PPR regulators use NPT threads, in sizes from 1/4" to 2". Pick the port that matches your pipe or fitting. Necking down to a smaller port to save a few dollars restricts the line and gives back the flow you paid for.
One thing worth knowing: a bigger port doesn't always mean more flow. Within a regulator body, the port and the flow are related but not identical. The SAR400 body is offered with a 1/2" port (180 SCFM) and a 3/4" port (210 SCFM), while the SAR600 body gives 330 SCFM at either 3/4" or 1". So choose the port to fit your piping, then check the flow number on the specific part you picked.
Step 2: Check the Flow (SCFM)
Flow is the volume of air a regulator can pass, measured in SCFM (standard cubic feet per minute). It has to cover what you draw, with room to spare. If you size it too tightly, you get droop: the pressure falls the moment you pull the trigger, and the tool feels weak even though the gauge looked fine a second earlier.
Here are typical air consumption figures for common tools, from Atlas Copco's published guidance. Your tool's own rating always wins.
| Tool | Typical air use | Typical pressure |
|---|---|---|
| Impact wrench | 3 to 5 CFM | 90 to 120 psi |
| Spray gun | 4 to 8 CFM | 30 to 50 psi |
| Air grinder | 4 to 8 CFM | 90 to 120 psi |
| Framing nailer | 2 to 4 CFM | 70 to 120 psi |
| Sandblaster | 6 to 25 CFM | 70 to 100 psi |
Add up what runs at the same time, not just your biggest tool. A regulator feeding a work cell where two grinders and a blow-off gun run together has to cover all three. Then pick a regulator rated well above that total: running one near its maximum rated flow is how you end up with droop and wasted air.
Two cautions. First, a regulator can only pass what your compressor delivers, so a larger regulator will not fix an undersized compressor. Second, the flow figures in our data come from the manufacturers, and the two series aren't measured the same way. SAR flow is rated at 90 psig. PPR flow is published without a stated test pressure. Compare sizes within a series, and don't line up an SAR number against a PPR number as though they were measured identically. If flow is critical to your application, ask us.
Step 3: Pick the Pressure Range
Every regulator has an adjustable range, set by its spring. Three things to check:
- Put your working pressure in the middle of the range. Regulator manufacturers suggest landing the pressure you need at roughly 50 to 80 percent of the range, and staying out of the top and bottom 10 percent. A very wide range gives you coarser adjustment and a bit more droop. If you need 45 psi, a 3 to 60 psi regulator will hold it more precisely than a 0 to 140.
- Check the maximum supply pressure. That's the highest pressure the inlet is rated to see. Every SAR and PPR regulator in this guide is rated for 250 psi supply.
- Don't confuse supply pressure with the regulated range. The range is what you can dial out at the outlet. SAR regulators regulate 0 to 150 psi. Standard PPR regulators regulate 0 to 140 psi, and the PPR listings also state a 140 psi maximum operating pressure, so 140 psi is the ceiling on the regulated side even though the inlet is rated higher.
For most shops a standard range does the job. There are also two low-pressure PPR options: 3 to 30 psi (the "-2") and 3 to 60 psi (the "-4"). Those are the pick for fine control at low pressure, such as spray work or small actuators. One detail to know: the gauge on the -2 and -4 reads from 0 (to 30 or to 60), but the regulator itself adjusts from 3 psi, not 0. If you need a low-pressure regulator that goes all the way to zero, we don't have one in the PPR line, so ask us about other options.
Step 4: Handle, Gauge and Bracket
These choices come last because they're about convenience rather than performance.
- Standard knob: pull the knob out to unlock it, turn to set the pressure, then push it back in to lock the setting. Every PPR model, and every SAR model without a "T" in the part number, uses this.
- T-handle (SAR models with a "T" in the part number): a hex nut locks the setting. The port, flow and range match the standard-knob version, so it's purely your preference. (We compare the two in Standard Knob vs. T-Handle Air Regulators.)
- Gauge: SAR regulators come with an external gauge. PPR regulators have the gauge embedded in the body, except the -2 and -4, which use an external gauge.
- Bracket: included on SAR200 through SAR600 and on all PPR models. The large SAR825 and SAR925 ship with a gauge only.
SAR or PPR: Which Series Do You Need?
The biggest difference is what each one is designed to be.
- SAR series is SMC style. It is not a direct replacement for SMC parts, but it gives you that familiar style of regulator with the widest size range we carry (1/4" to 2"), a T-handle option, and pilot-operated models for the biggest lines.
- PPR series is an aftermarket replacement regulator, manufactured to meet the dimensional and functional requirements for proper fit and performance. It runs 1/4" to 3/4" NPT with an embedded gauge on the standard models. If you're replacing a regulator that's already in service, send us the part number off the old unit and we'll confirm whether a PPR matches it before you buy.
Both series are relieving types, rated for 250 psi supply, and carry a 1-year limited manufacturer warranty. Both are made in Korea. SAR regulates up to 150 psi; PPR up to 140 psi.
SAR Series Sizes
All SAR regulators regulate 0 to 150 psi, are rated for 250 psi supply, and have flow rated at 90 psig. Each T-handle version matches its standard-knob twin on port, flow and range.
| Part number | Port (NPT) | Flow (SCFM at 90 psig) | Good for |
|---|---|---|---|
| SAR200-N02BG | 1/4" | 39 | Single tools, spray guns, small cylinders |
| SAR300-N03BG | 3/8" | 105 | Several tools or a machine-level supply |
| SAR400-N04BG | 1/2" | 180 | Branch lines and work cells |
| SAR400-N06BG | 3/4" | 210 | Larger branch lines, high intermittent demand |
| SAR600-N06BG | 3/4" | 330 | High-demand machines, multi-station lines |
| SAR600-N10BG | 1" | 330 | High-demand machines on 1" piping |
| SAR825-N12G | 1-1/4" | 600 | Main-line and header pressure control |
| SAR825-N14G | 1-1/2" | 600 | Main-line and header pressure control |
| SAR925-N20G | 2" | 630 | Main-line and header control on 2" piping |
Why the SAR825 and SAR925 are different: they're pilot-operated, using an internal pilot. Instead of the adjusting spring acting directly on the main valve, a small pilot stage does the controlling, which is how large regulators hold pressure steadily at high flow. They're built for headers and main lines rather than individual tools, and they ship with a gauge rather than a gauge and bracket.
T-handle versions are available in the SAR200, SAR300, SAR400 and SAR600 sizes. Add a "T" after the series number to find them (for example, SAR300T-N03BG).
PPR Series Sizes
PPR regulators regulate 0 to 140 psi unless noted, are rated for 250 psi supply, and all use a standard pull-to-unlock knob.
| Part number | Port (NPT) | Flow (SCFM) | Range (psi) | Good for |
|---|---|---|---|---|
| PPR2-N02BG | 1/4" | 59 | 0 to 140 | Air tools, spray guns, small actuators |
| PPR2-N02BG-2 | 1/4" | 59 | 3 to 30 | Fine adjustment at low pressure |
| PPR2-N02BG-4 | 1/4" | 59 | 3 to 60 | Low-pressure work up to 60 psi |
| PPR3-N02BG | 1/4" | 86 | 0 to 140 | More flow at a 1/4" port |
| PPR3-N03BG | 3/8" | 113 | 0 to 140 | Several tools or a machine-level supply |
| PPR4-N04BG | 1/2" | 210 | 0 to 140 | Branch lines and work cells |
The PPR2 and PPR3 are body sizes, not port sizes. Both are offered with a 1/4" port, but the PPR3 is the higher-flow body: 86 SCFM against 59. That's a good illustration of why you check the flow figure and not just the thread size. A 3/4" PPR4 is also made; it isn't listed on the site yet, so ask us if you need one.
Quick Picks by Situation
- One tool or a spray gun in a home garage: SAR200 (1/4") or PPR2 (1/4"). For spray work, consider the PPR2-N02BG-4 (3 to 60 psi) for finer control.
- A shop wall drop feeding several tools: SAR300 or PPR3-N03BG at 3/8".
- A work cell or branch line: SAR400 or PPR4 at 1/2", or the SAR400 at 3/4" for more flow.
- A high-demand machine or multi-station line: SAR600 at 3/4" or 1".
- A main line or header: SAR825 (1-1/4" or 1-1/2") or SAR925 (2").
- Replacing a regulator that's already in service: send us the part number off the old unit and we'll tell you whether a PPR matches it.
Common Mistakes to Avoid
- Buying by thread size alone. Two regulators with the same port can differ by more than half in flow: the 3/4" SAR600 passes 330 SCFM against the 3/4" SAR400's 210. Check the SCFM.
- Sizing for one tool when several run at once. Add up simultaneous demand.
- Setting the pressure with no air moving. Set it while the tool or machine is actually running, so the number on the gauge reflects real operating conditions rather than a static reading.
- Mounting it too far from the point of use. Install it close to the equipment, downstream of any filter.
- Running higher pressure than the job needs. It wastes air and energy.
- Ignoring flow direction. Match the inlet and outlet markings on the body.
Still Not Sure? Ask Us
If you're stuck between two sizes, don't guess. Tell us what you're running: the tool or machine, your pipe size, the pressure you want, and roughly how much air it uses. We'll point you to the right regulator. If you're replacing an old one, send us the part number or a photo of the label.
→ Shop PneumaticPlus Air Pressure Regulators →
→ Contact our team for sizing help →
Educational information only. This article is provided by PneumaticPlus for general educational and informational purposes. Specifications are taken from the manufacturers' published data and may change; always confirm ratings on the product page and in the instruction sheet before you buy or install. Compressed air systems are under pressure and can cause injury or property damage if misused: shut off and depressurize the line before installing or servicing any component, and never exceed a component's rated pressure. This article is not engineering, safety or legal advice; consult a qualified professional for your application. All brand names and part numbers referenced are the property of their respective owners. PneumaticPlus is not affiliated with, endorsed by or sponsored by any other manufacturer, and "SMC style" describes the design style of the SAR series only; SAR regulators are not a direct replacement for SMC parts.